Pairing with Lifesize Cloud
Pairing registers your Fusion video conferencing system with your Lifesize Cloud organization and associates it with a conference room. Once paired, the device can place and receive calls, join meetings, and be managed from Lifesize Cloud.
Before you can use your Fusion video conferencing system you will need to define a few settings and pair your hardware with the Lifesize Cloud.
Note: To pair your system you will need access to a computer or laptop with a web browser.
When the Fusion hardware boots up for the first time an IP address displays on the room screen. This unique web address is generated by Lifesize and is used to connect to Lifesize Cloud later in the setup.
Important: Make a note of this IP address. You will need it to complete the Fusion system setup.
On your computer or laptop, open your browser and enter the IP address for your Fusion system. The Welcome to Lifesize! screen displays.
Selecting a Language
On the Welcome to Lifesize! screen you will need to select what language to continue the setup with.
- Tap the Choose your Language arrow and select from the list that displays.
- Tap Next.
Defining General Settings
- On the General Settings screen, tap the Choose your Time Zone arrow and select from the list that displays.
- Leave Enable Proxy Server (BETA) turned Off.
- Tap Next.
Setting a Password
- On the Set Your Password screen, enter a WebUI Admin Password.
- Enter the password again in the Confirm WebUI Admin Password field.
- Tap Next.
Defining Input Devices
- On the Set Your Audio Input screen, ensure that your speakerphone is selected.
- Tap Next.
- On the Set Your Audio Output screen, ensure that your speakerphone is selected.
- Tap Next.
- On the Set Your Camera screen, ensure your Fusion Camera is selected.
- Tap Next.
Pairing your System
Once you complete your camera set up the system opens a new browser window so that you can complete your Lifesize Cloud pairing.
- On the Pair your video system screen, the Fusion’s unique extension number is automatically generated for you.
- You can choose to pair with a:
- New Room – Select Create a new room.
Enter a name for the new room and optionally, enter an email address for dialing. - Existing Room – Select an Existing Room.
Place your cursor in the text field and begin typing the room name. As you type, results that match your entry display in the list. Select the room you want to pair. - Individual User – Select Individual User.
Place your cursor in the text field and begin typing the user’s name. As you type, results that match your entry display in the list. Select the user you want to pair.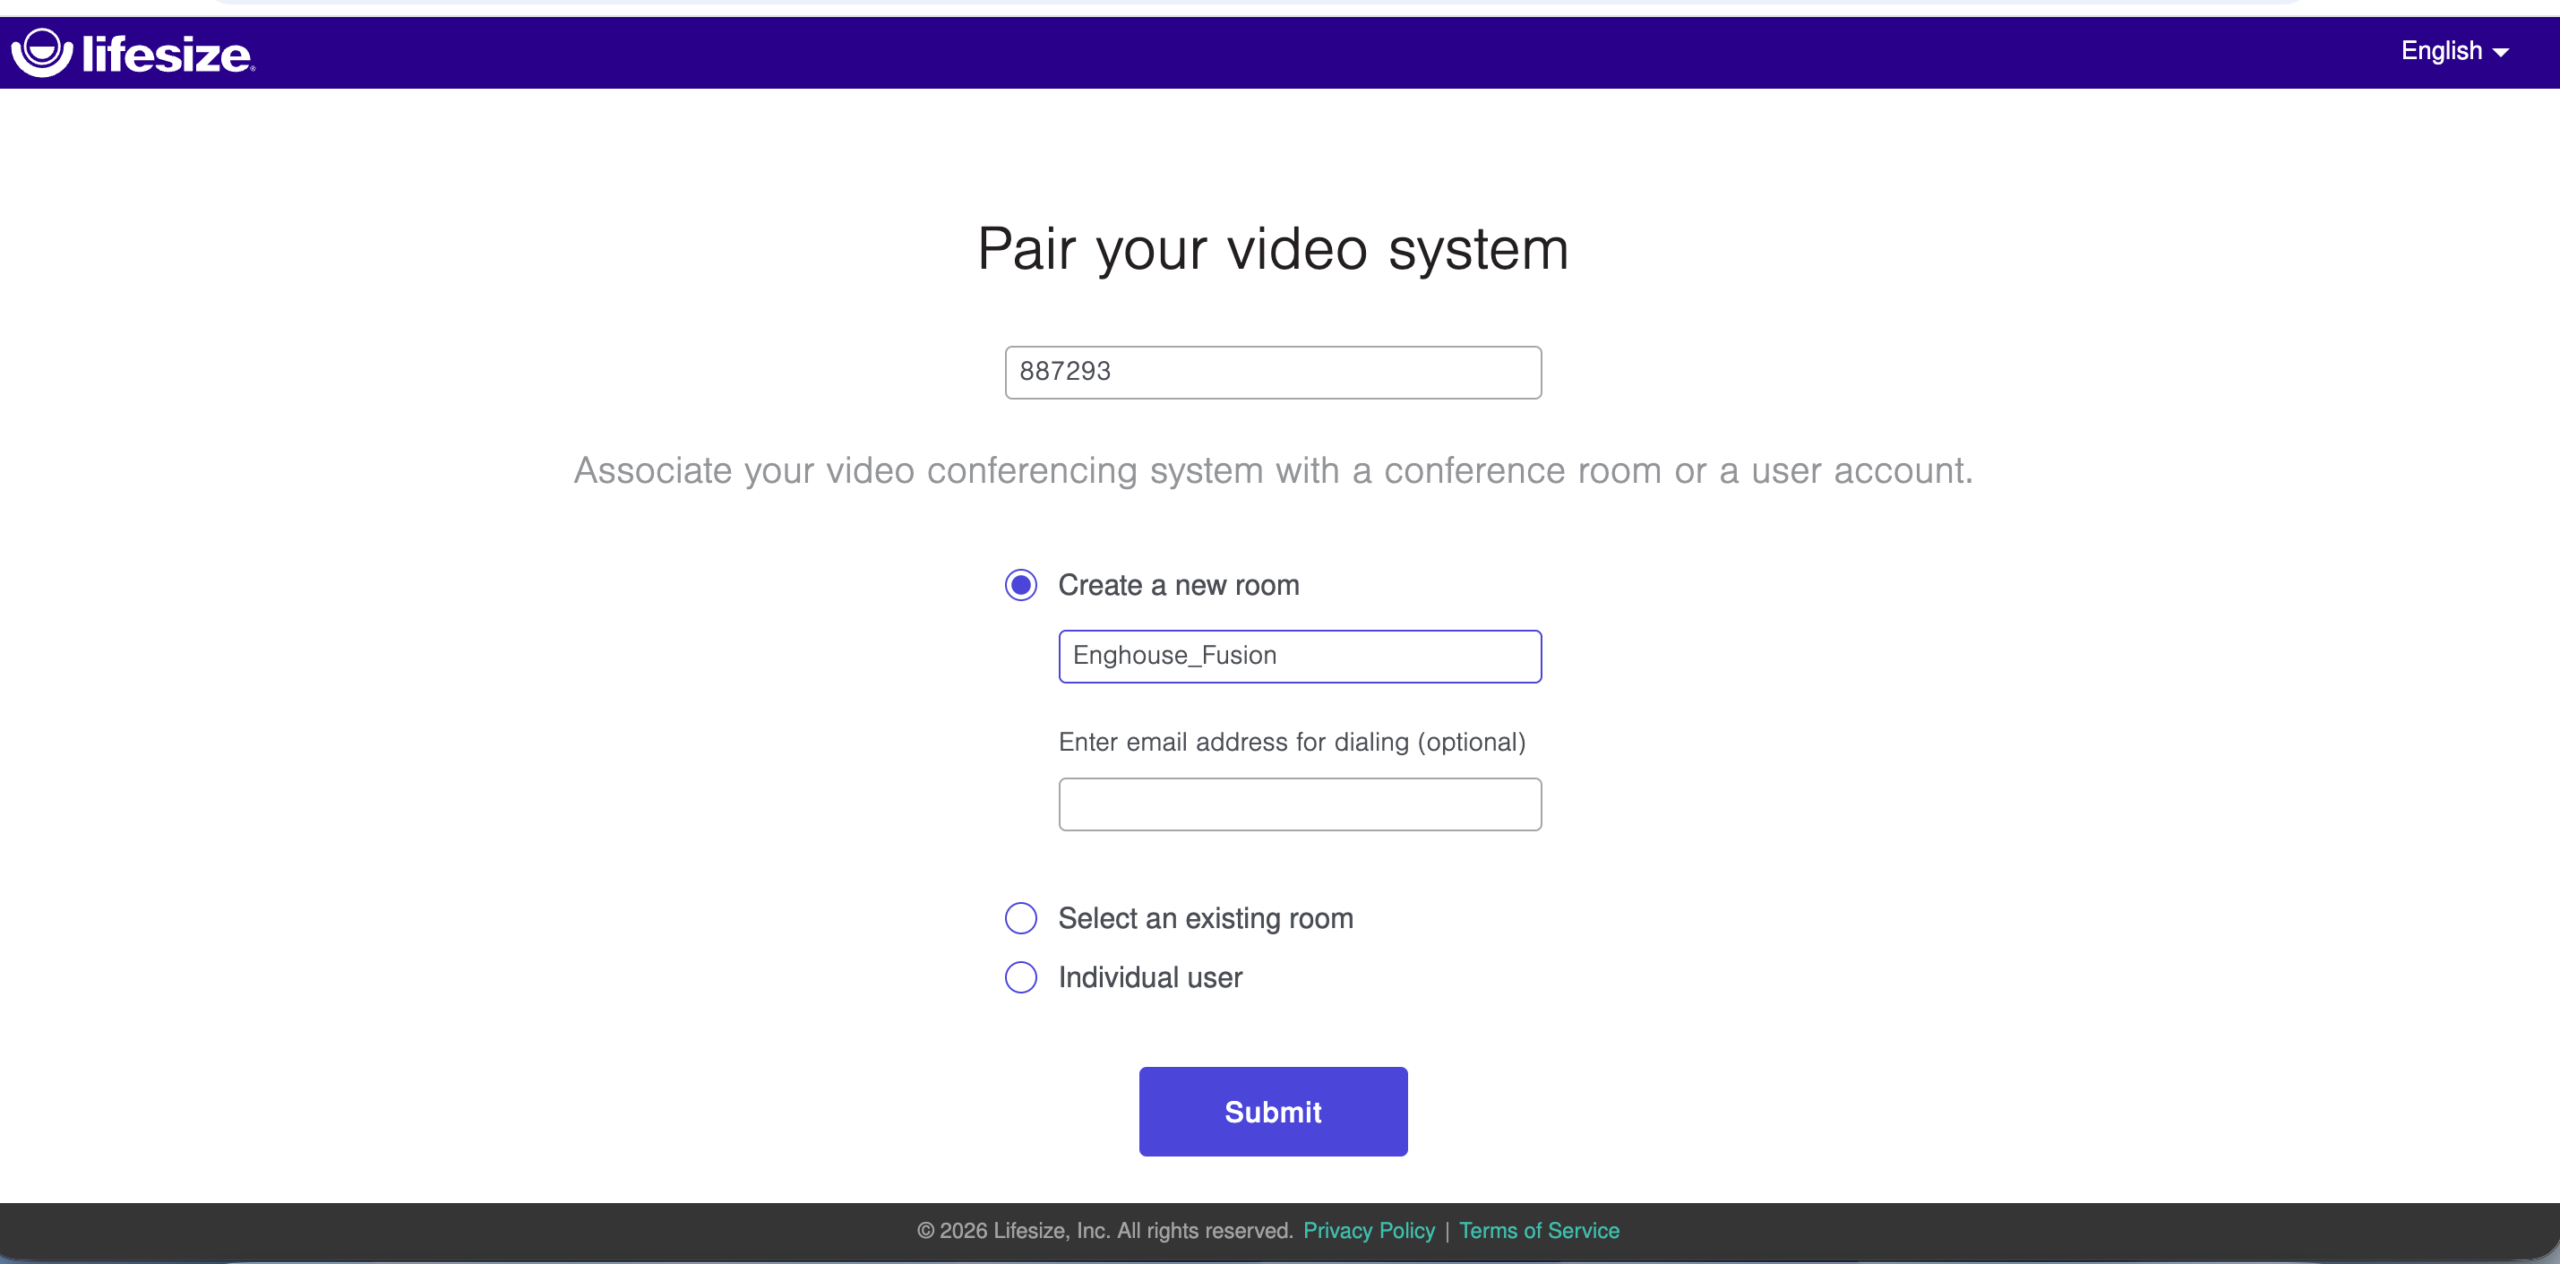
- New Room – Select Create a new room.
- Tap Submit. A QR code and Access ID display on the screen.
Important: You will need to enter the Access ID or scan the QR code to complete the pairing process with your tablet.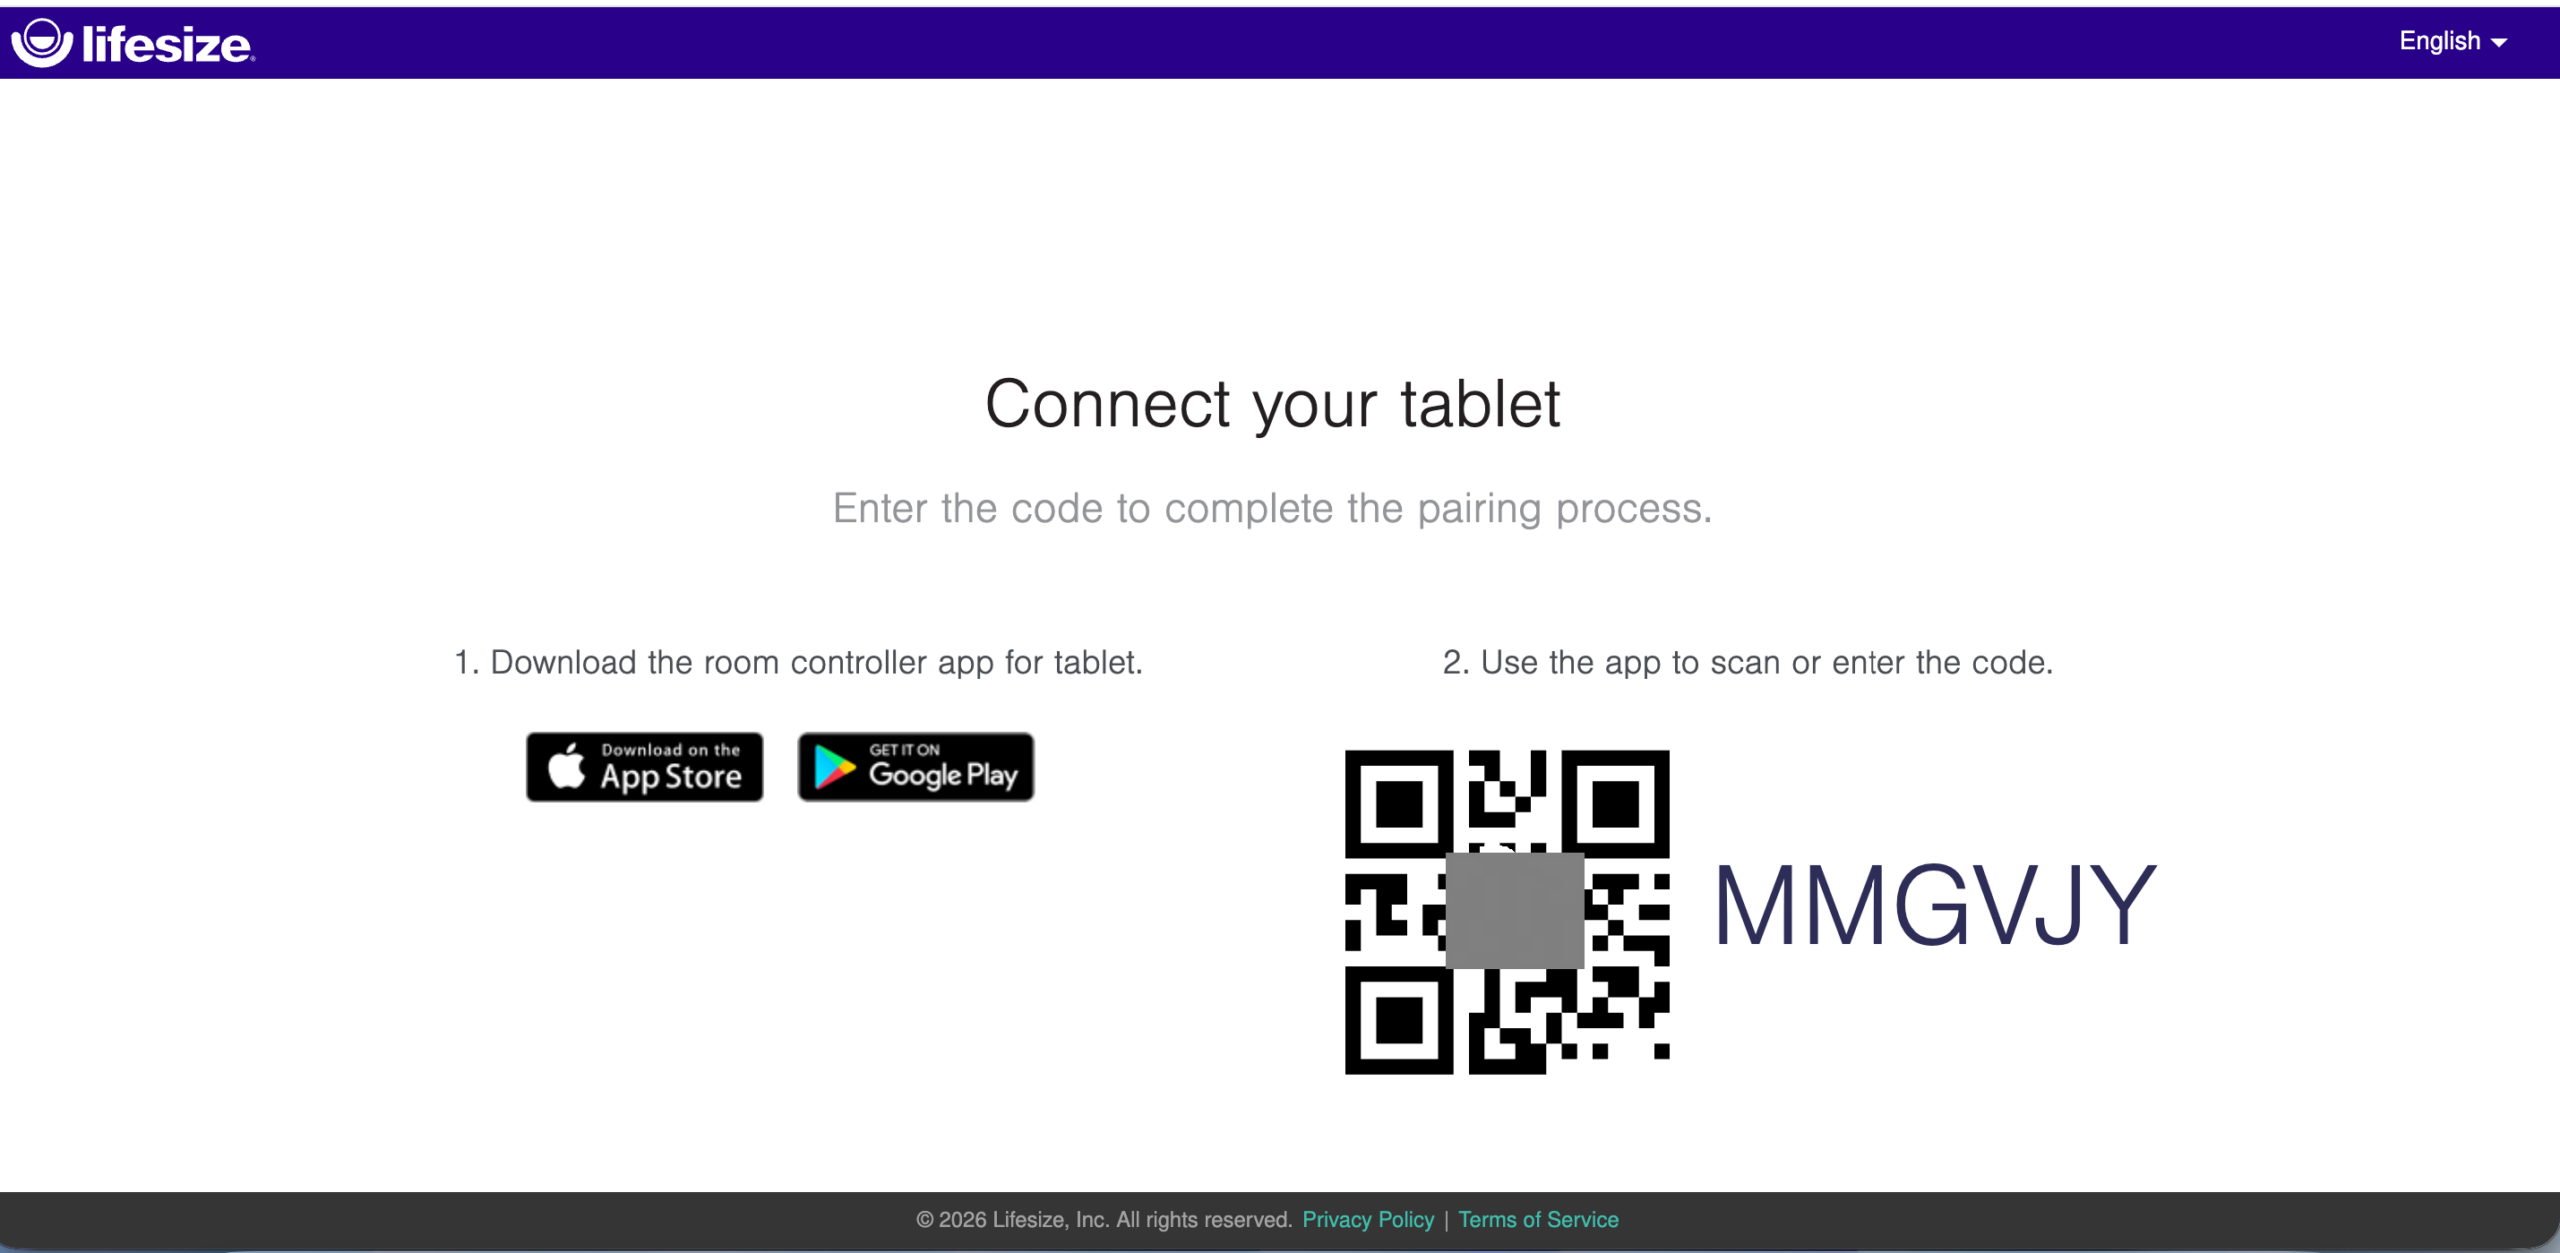
Connecting your tablet
Now you need to connect your Fusion room system to the Lifesize Room Controller App.
- Open the room controller app on your tablet. The Room Access ID window displays.
Note: If you haven’t installed the application, you can download it from the Apple Store or Google Play.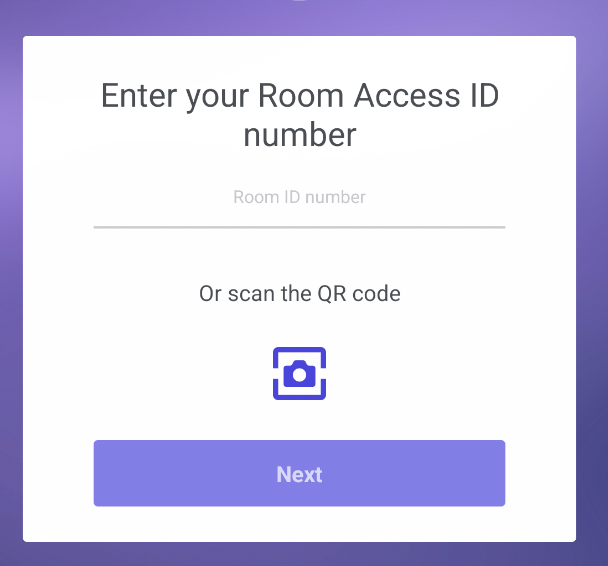
- Enter the Room Access ID that displays on your computer or laptop. If your tablet has a camera, you can tap the camera icon and scan the QR code that displays on your computer or laptop.
- Tap Next to proceed to the Meet screen to make a test call. When successful, the Congratulations! screen displays on your computer or laptop.