SIP
- Enter the IP Address of the device in your browser. Enter your username and password.
- Navigate to Admin Settings > Network > IP Network > SIP.
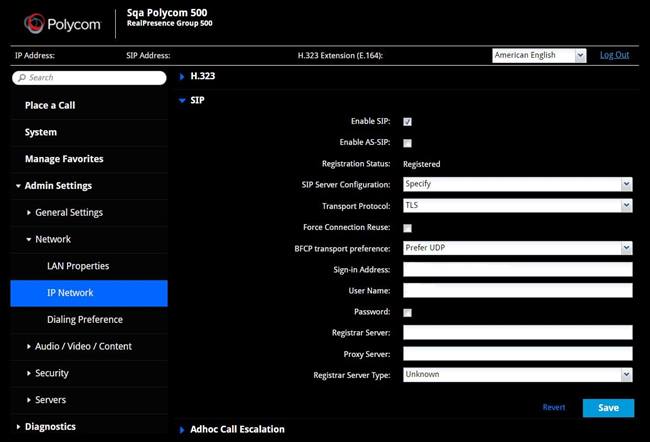
- Configure the following:
- Enable SIP.
- Select Specify for SIP Server Configuration.
- Select TLS for Transport Protocol.
- Select Prefer UDP for BFCP Transport Preference.
- Enter <Lifesize [email protected]> as the Sign-in Address:
- Enter the SIP extension for the Username. This is the extension of the device.
- Enter lifesizecloud.com as the Registrar Server.
- Enter lifesizecloud.com as the Proxy Server.
- Select Unknown as the Registrar Server Type.
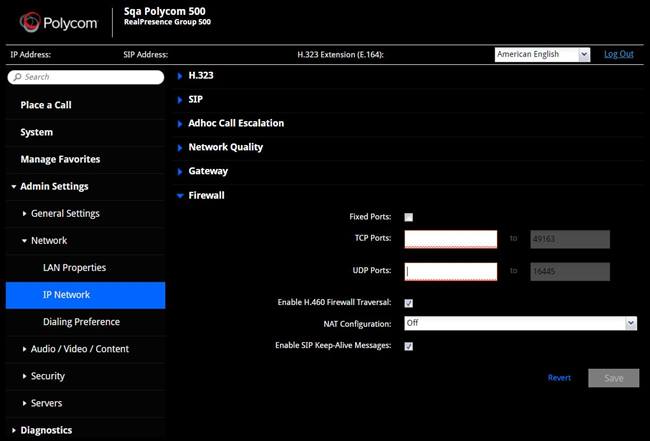
- Expand the Firewall section, and then enable H.460 Firewall Traversal.
- Click Save.
To view the status of your system, navigate to Diagnostics > System > System Status.
Configure LDAP
- Navigate to Admin Settings > Servers > Directory Servers.
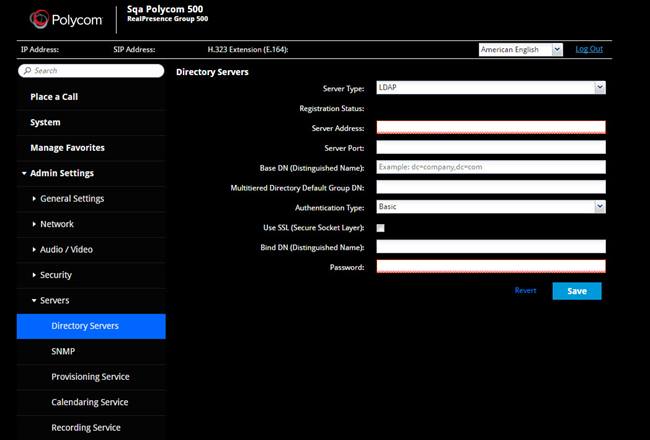
- Configure the following:
- Select LDAP for the Server Type.
- Enter ldapexport.lifesizecloud.com as the Server Address.
- Enter the Server Port. See Open Network Ports for more information.
- Enter o=cloud, dc=lifesize, dc=com as the Base DN (Distinguished Name).
- Enter o=cloud, dc=lifesize, dc=com as the Multitiered Default Group DN.
- Select Basic as the Authentication Type.
- Select the Use SSL (Secure Socket Layer) check box.
- Enter uid=<extension> as the Bind DN (Distinguished Name).
- Enter the password provided by Lifesize.
- Click Save.